What's In Your Bag?
Thoughts on a next article as well
Pat David — May 4th, 2015

Thoughts on a next article as well
Pat David — May 4th, 2015
That lede image above is a quick (and dirty) snapshot of my go-to bag for running out the door. I thought it might be fun to take a diversion and talk about gear a little bit. Here’s the full image again:
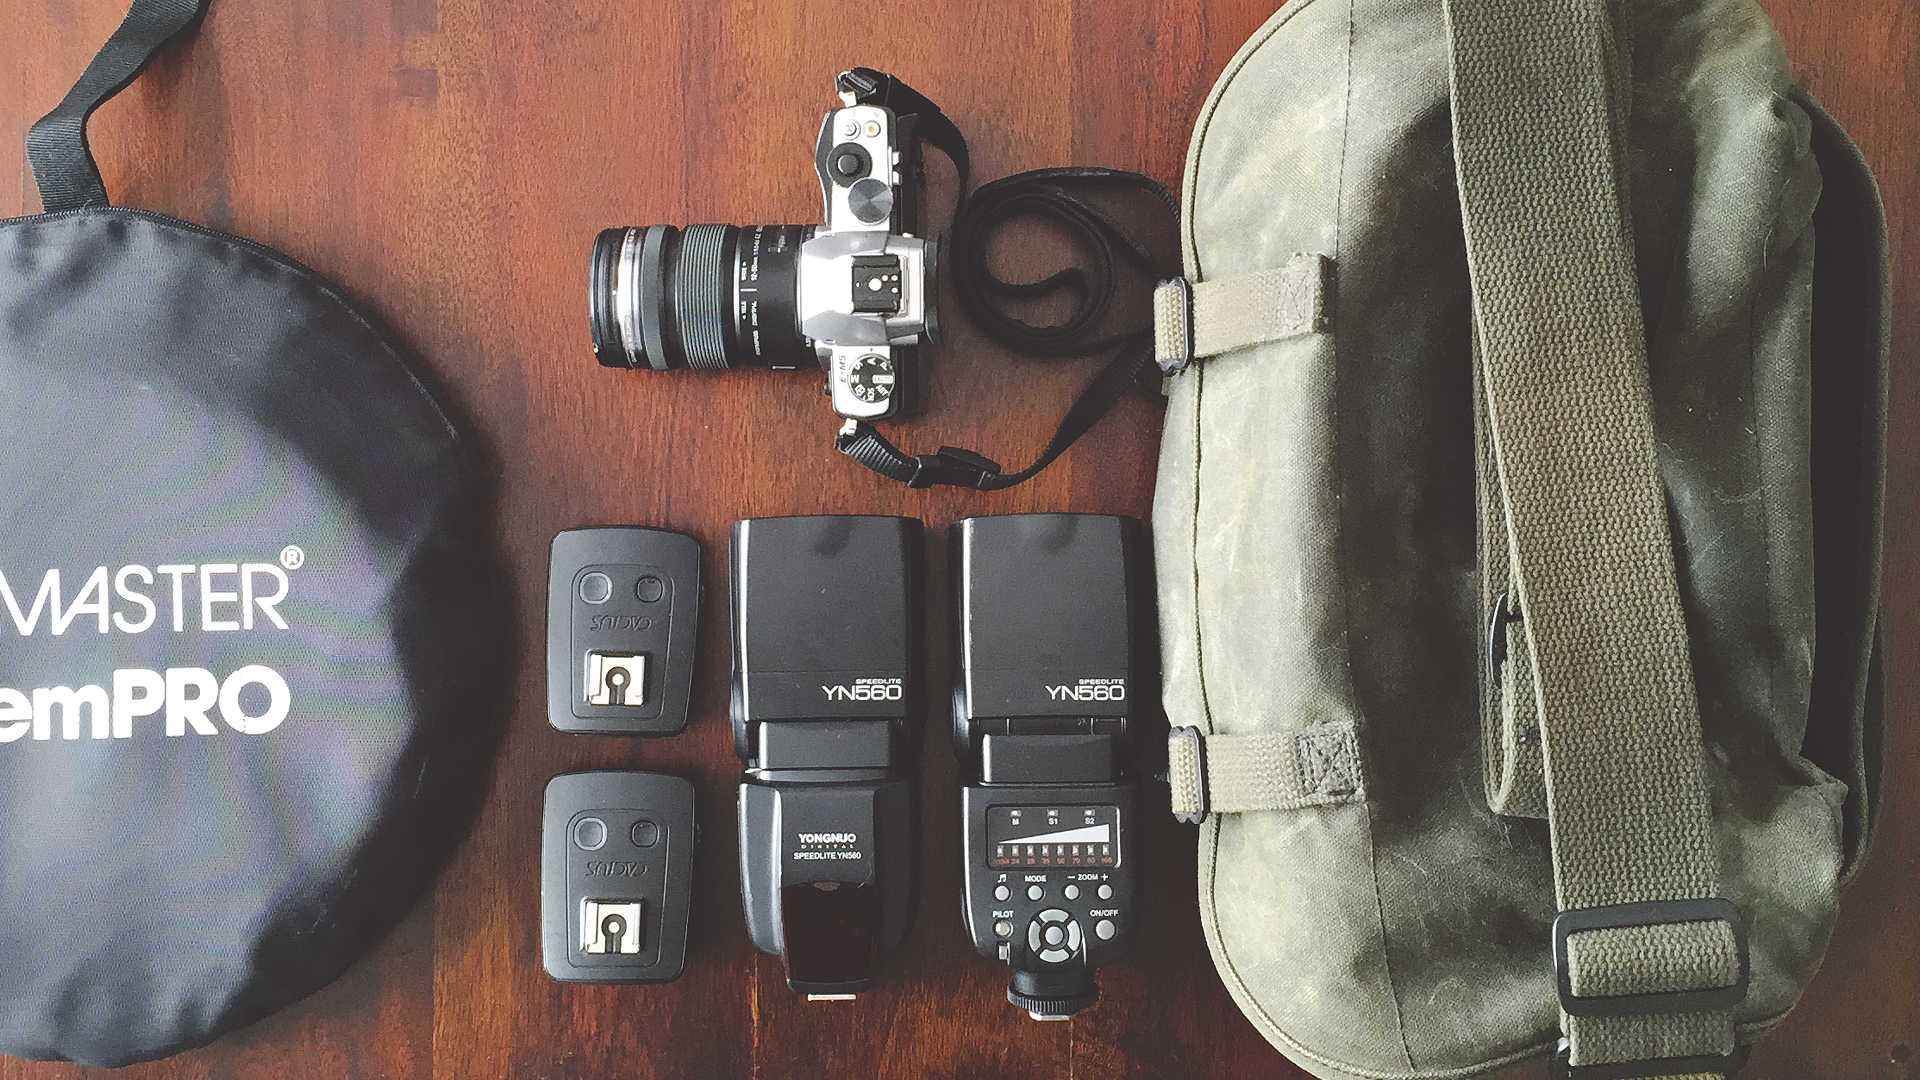
I had decided years ago on going with Micro Four Thirds (MFT) as a camera system because I like to travel light, and wanted options to adapt old lenses. (On a side note, I’m still angry that there is not focus-peaking on the E-M5…)
My camera is the Olympus OM-D E-M5 (usually paired with the 12-50mm weatherproof lens when I’m out and about). This is a perfect combination for me, particularly when I’m chasing around a 4 year old in who-knows-where situations. A water and dust resistant lens/body is nice to have.
On the far left is a Promaster 5-in-1 reflector (41 inch). These are usually relatively inexpensive and absolutely indispensable pieces of gear that can be adapted to many different situations.
I was recently reminded of this yet again while on a walk through some gardens…
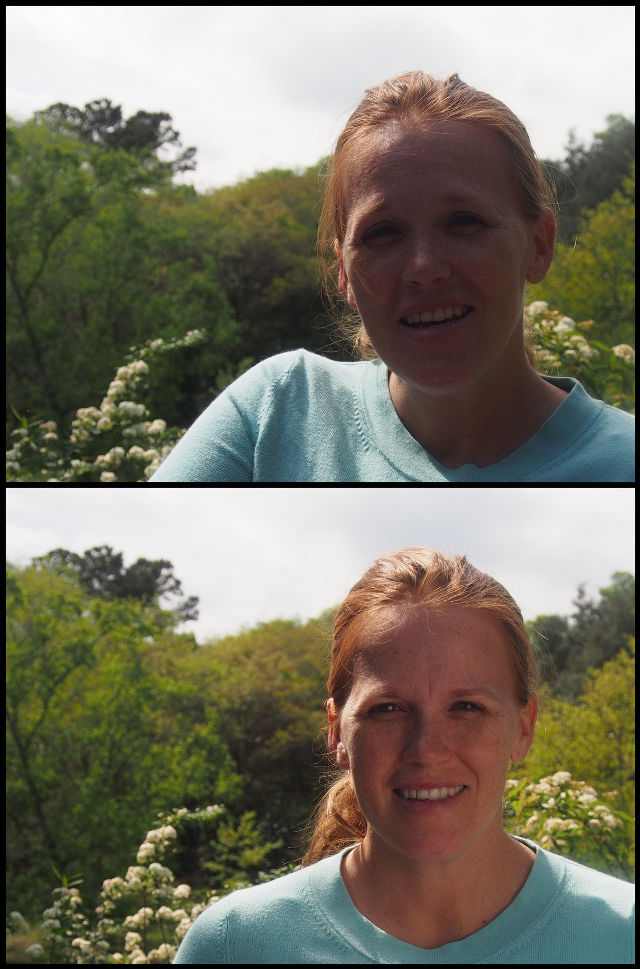
The base of the reflector (without its covering) is a great translucent scrim that is handy to use with flashes if you need to soften things up a bit (and not lug around a softbox).

Speaking of flashes, you’ll also find my pair of Yongnuo YN-560 manual speedlights. I’ve been slowly teaching myself lighting with speedlights, so rarely will I not have them with me. To use them off-camera I also have a pair of Cactus V5 transceivers (one to transmit, one to receive).
Everything (except the reflector) packs nice and neatly into my wife’s old camera bag (a precursor to the Domke bags) that I ran off with. (That is, the old camera bag of my wife, not the old bag, my wife).
The bag is canvas and I waxed it myself to give it some water resistance. This basically consisted of me melting some wax and brushing it all over the bag, then using a hairdryer to further melt it into the fibers. This was a great DIY project that was relatively inexpensive (about $8USD for more wax than you’ll need) and relatively quick to do (just a few hours total).
I’d love to see what others are using out there! Take a minute, snap a photo of your gear/bag, and share it with us. Bonus points if you arrange it by knolling.
I was recently poked by someone on the GIMP-Web mailing list to update one of the tutorials on www.gimp.org about sharpening. I thought about it, then decided it may be better just to write some new material from scratch.
I figured why stop there? I might as well make it a fun post here taking a look at what methods we have for sharpening, why you may (or may not) want to use them, and where in the processing pipeline it makes sense. (While still pushing the GIMP specific sharpening thoughts to a separate tutorial there).
If anyone has thoughts around this or just wants to share what they’re doing, please let us know in the comments below.

Free/Open Source Photography


Unless otherwise noted content on this site, PIXLS.US by Pat David, is licensed under a Creative Commons Attribution-ShareAlike 4.0 International License.