Processing a nightscape in Siril
A basic tutorial

A basic tutorial
Siril is a program for processing astronomical photographs.
In this tutorial, I’ll show you how to process a nightscape in Siril 0.9.10.
It doesn’t intend to be comprehensive tutorial but rather to present a basic general workflow that is a good starting point for those who want to learn Siril.
For this purpose, I’m sharing the raw files I used for the image I presented here, except that for this tutorial I limited the number of frames for the sake of bandwidth and processing speed.

You can find and download the raw files here (~1GB).
The raw files are placed in specific sub-folders according to their use:
./Bias (20 files)./Darks (15 files)./Flats (15 files)./Lights (10 files)Bias, dark, and flat field frames are also called “calibration” frames, their purpose being to improve the quality of the image by correcting the signal-to-noise ratio (in the case of bias and dark frames) and vignetting (with the flat frames). There are several places where you can learn more about the different types of frames for astrophotography.
At the root of the folder, I placed two text files with the .ssf extension, these are scripts used by Siril for batch processing the files. Quite useful. If you want to run a script from Siril, place the .ssf files in ~/.siril/scripts. Upon restarting Siril, a new Scripts menu appears in the top menu bar, allowing you to launch the installed scripts.
I suggest you download the whole folder (~1GB), and move the scripts as indicated above. This way, if you set the working directory in Siril to the root of the folder, launching the script named processing_from_raw.ssf will automagically process the raws and create the output image in both .fit and .tif (16-bit) formats. Please note that in order to successfuly run the scripts, there must be a folder structure like the one used in this tutorial.
I will present the steps I used to process an image of the Milky Way. I don’t know if it’s the best way, but it’s probably close to what the developers of Siril advise to do for the general case of starting from raw files (actually, I started from one of their scripts and just slightly adapted it).
We will start with processing the calibration files, and then processing the lights.
Change dir….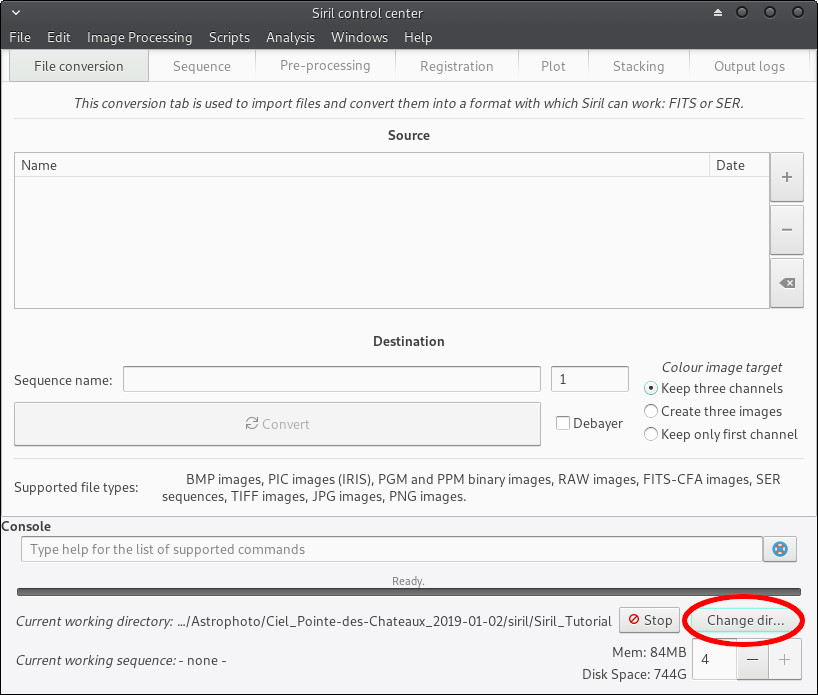
+ button as shown (make sure that you select RAW DSLR Camera Files in the combo box) and select the bias frames located in the Bias subfolder.
bias (or whatever you see fit) to set the prefix of the sequence and subsequent files, and click Convert to convert the files to the FITS format, which is the main format used by Siril. Note that you don’t need to demosaic the files yet, make sure the Debayer box is unchecked.When done converting the bias frames, a window will pop up showing a preview of one of the bias frames. Note that since it’s not demosaiced, it will only show as a B&W channel image.
At this point, the bias frames are loaded and ready to be processed to make a master-bias frame.
It should look like this:
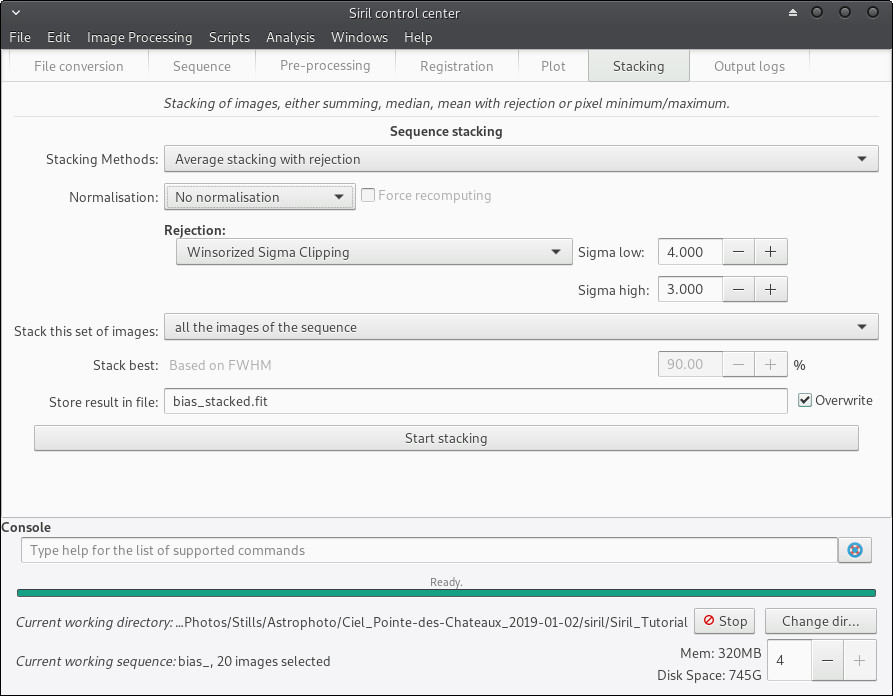
bias_stacked.fit in the Bias subfolder.Since the flats also contain the sensor readout noise (contained in the bias frames), we should remove it by subtracting the master-bias.
In the File conversion tab, remove the files already loaded by clicking on the button located just below the - (minus) button, and by clicking on the + (plus) button select and load the flat frames located in the Flats subfolder.
Set the working directory to the Flats sub-folder by clicking on “Change dir…” and set the Sequence name as “flats”.
Like for the bias frames, ensure Debayer is unchecked, then click on Convert.
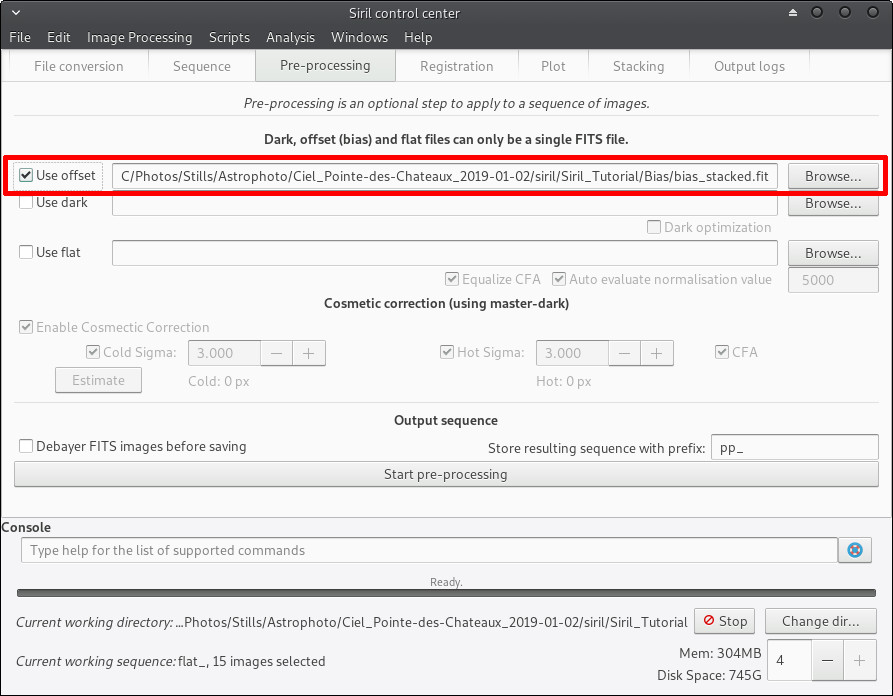
In the Pre-processing tab, check only the Use offset box, click on Browse to select the Bias/bias_stacked.fit file, and click on Start pre-processing.
To generate the master-flat, go to the Stacking tab, and this time set Normalisation to Multiplicative and the Stacking Method as Average with rejection.
Click on Start stacking to produce the pp_flat_stacked.fit master-flat frame in the Flats subfolder.

As with the bias and flats, you need to load the dark frames.
In the File conversion tab, remove the files already loaded, select and load the dark frames located in the Darks subfolder.
Set the working directory to the Darks sub-folder by clicking on Change dir…, and set Sequence name as darks.
Debayer should be unchecked.
Click on Convert.
The darks need to be stacked the same way as the bias frames. In the Stacking tab, choose Average with rejection and No normalisation.
Click Start Stacking.
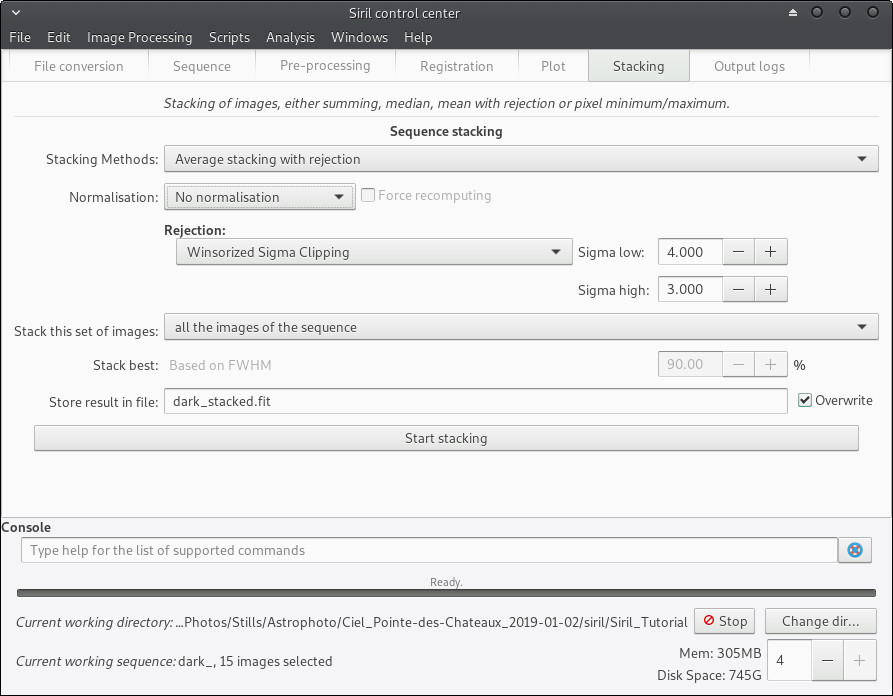
The master-dark frame is saved as Darks/dark_stacked.fit.
Note: if you take images often in the same conditions (same air temperature, same exposure settings), you can save the dark_stacked and pp_flat_stacked files, and re-use them to process future light frames faster. I read on some forums that some astrophotographers keep their calibration files and use those for around 1 year, before taking new calibration frames.
Now it’s time to start processing the light frames, by first subtracting the darks (which also contain the bias signal) and the flats (from which bias has already been subtracted).
Select the light frames in the File conversion tab.
Set the Sequence name to lights, and point the working directory to the Lights (Change dir...).
Convert the files, still without debayering.
Then go to the Pre-Processing tab, check Use dark, select the Darks/dark_stacked.fit file, check Use flat, and select the Flats/pp_flat_stacked.fit file.
Make sure that the other boxes are checked as in the following screenshot.
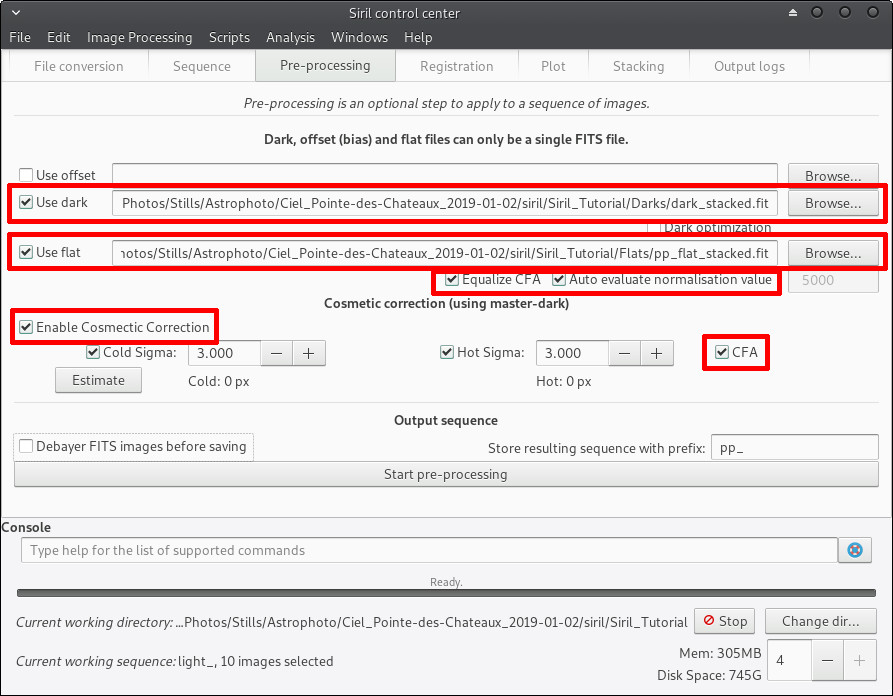
Note that “Cosmetic Correction” can also be done from the “Image Processing” tab.
This will produce new FITS files with the prefix pp_light_ and the corresponding .seq file. These files are loaded.
It’s time to demosaic our processed files. There’s something strange in the GUI, in that after pre-processing, when you uncheck “Use dark” and “Use flat” boxes, the “Debayer FITS images before saving” and the “Start pre-processing” button become grayed out.
pp_light_000xx.fit files.db_pp_light as the sequence name.
The pre-processed lights will be saved as FITS files, and the corresponding db_pp_light.seq file loaded. Two preview windows will open this time, one with the 3 RGB channels separated, and one with the RGB composite image.
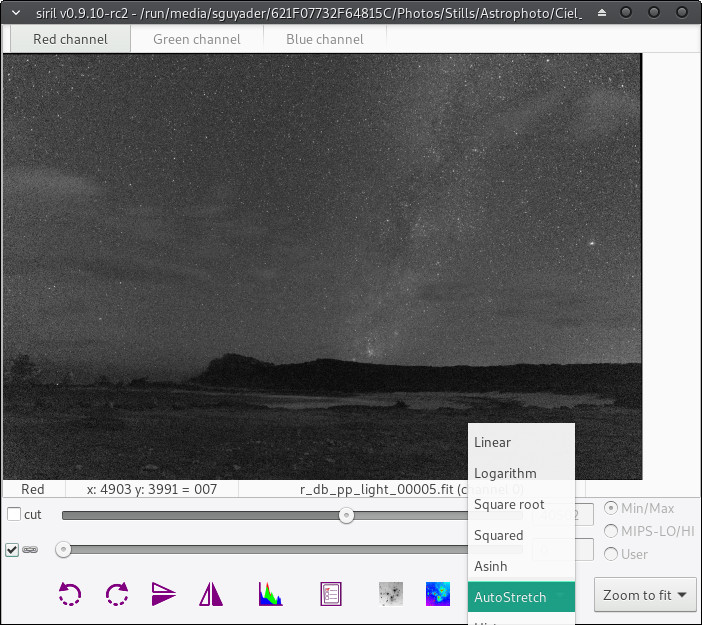
If you have more 8GB of RAM, you can try checking the Simplified Drizzle x2 box (it will up-sample the images by a factor 2, increasing the RAM usage by a factor 4). Siril will detect the stars and register each of the 10 images. The preview windows will be updated. By the way, you can play with the zoom and select AutoStretch to get a better preview of the selected image.
In the Stacking tab, make sure that Average with rejection is selected as the stacking method, and that Additive with scaling is set for Normalisation.
Click on Start stacking.
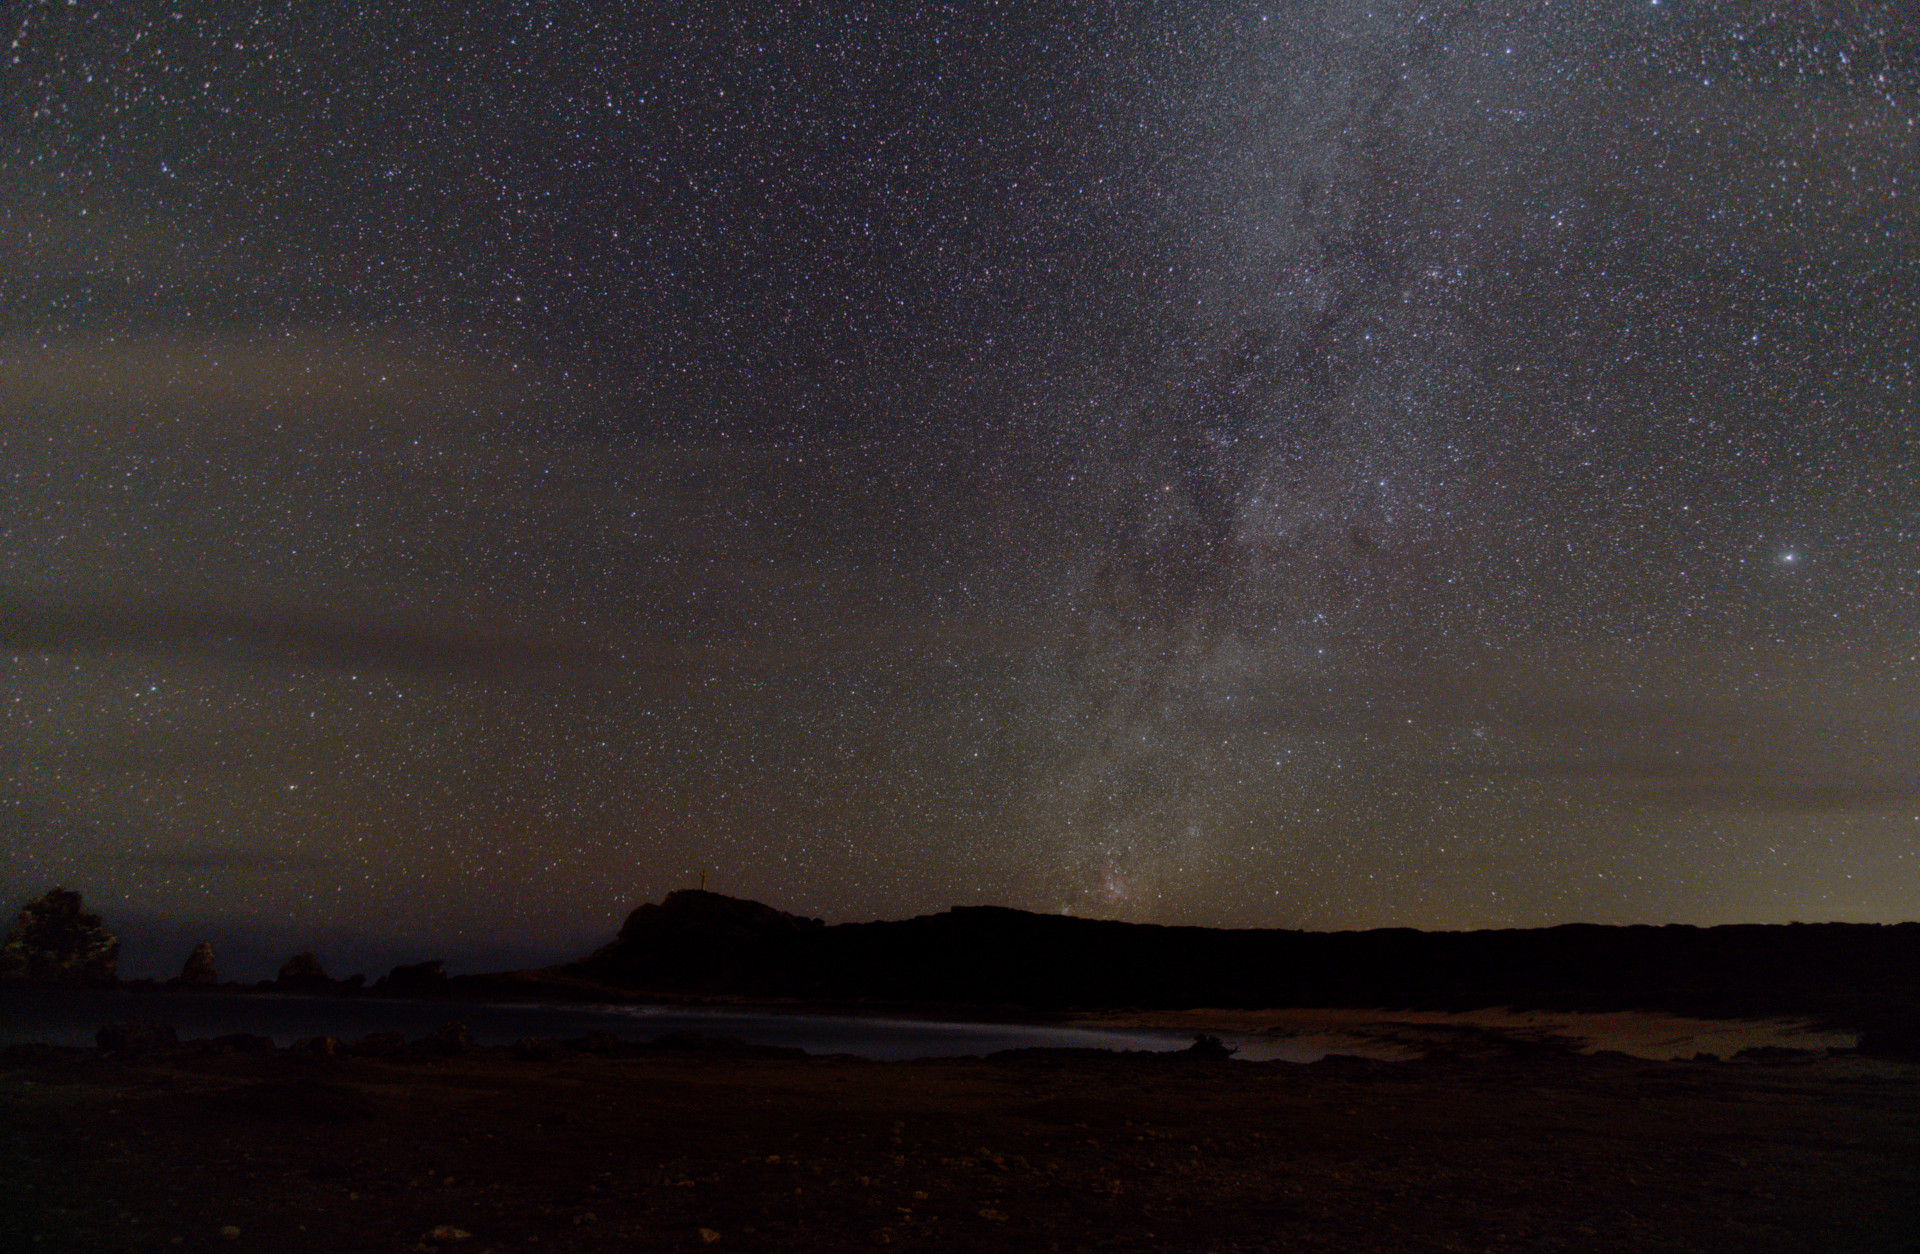
The resulting aligned and stacked image will be saved as Lights\r_db_pp_light_stacked.fit.
Siril can do some more or less specialized post-processing to your image. I found it interesting to use.
crop 30 30 5950 3970.The resulting image can be saved as JPEG, TIFF, PNG, etc. for further processing in your favorite image editor or as a finished image if you’re satisfied.
The problem with this whole process, is that because the images have been aligned with the stars as reference, the foreground will be blurred because earth moved between successive frames. What I do is to reprocess the light frames from just after the calibration step (i.e. after the dark and flat frames subtraction) but only skipping the stars registration step. By doing so, the foreground will undergo the same pre- and post-processing, and the resulting image will have a sharp foreground and trailing sky.
I provided a script (processing_from_raw_foreground.ssf) which will do that for you, if you already used the first script or if you use the same file naming convention as in the script.
Finally, in your favorite image editor, you can combine the “sky” and “foreground” images using a mask, to get both the sky and the foreground sharp.
Here’s what I obtained following these steps (but using the scripts), after just combining the 2 images in Gimp:

And after quick curve and saturation tweaking in Gimp:

Free/Open Source Photography


Unless otherwise noted content on this site, PIXLS.US by Pat David, is licensed under a Creative Commons Attribution-ShareAlike 4.0 International License.